
GROUP PROJECT
RISD ROVER
Design and fabrication for the carbon fiber seat of Rover, a student team competing in NASA's Human Exploration Rover Challenge.
OVERVIEW
About RISD ROVER
RISD ROVER's mission
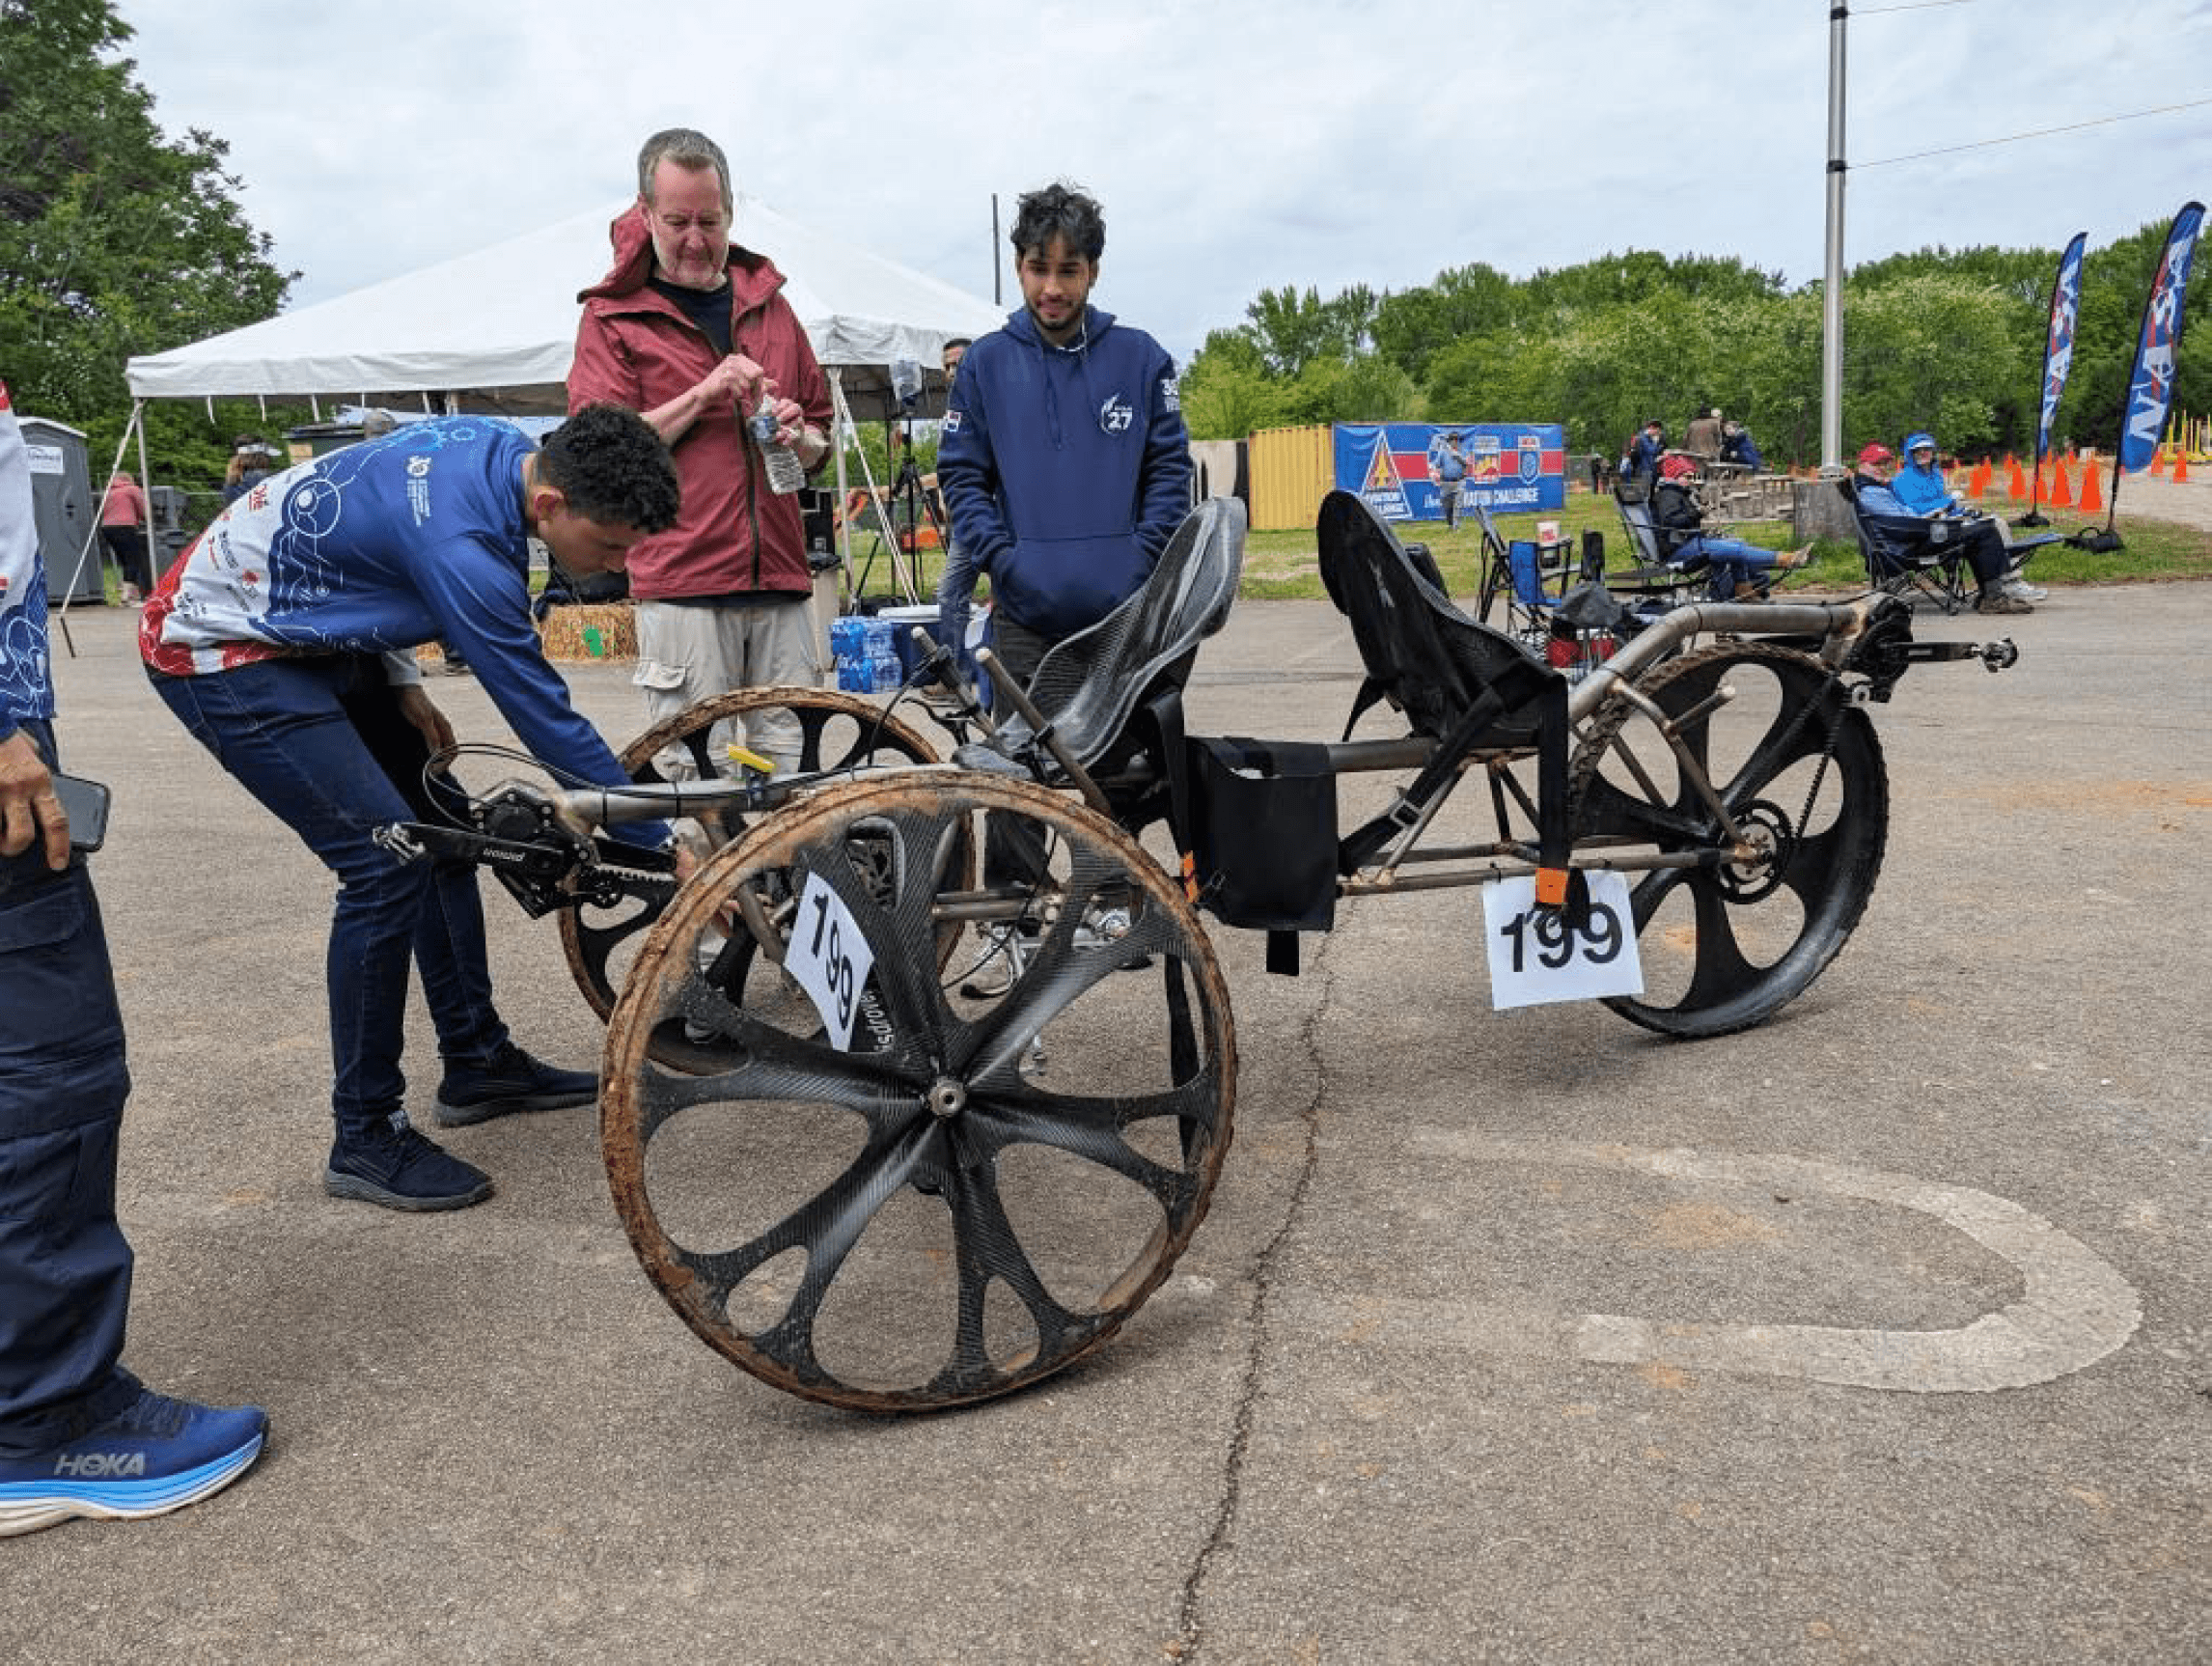
RISD Rover is a student-run organization at RISD that contributes award-winning designs to the aerospace industry. It mainly involves NASA’s Human Exploration Rover Challenge, building the rover, and running the race on the mars-like environment.
I’ve joined the club since 2022 and participated in the HERC twice. Especially, in 2024 HERC, I was a driver of the Rover and the lead product designer of the seat design team.


Design Overview


BACKGROUND
Problem
Redesign and fabrication are necessary for better driving.
During the second race of the 2023 HERC competition, the front seat fell off due to the weakness of the attachment between the seat and the chassis.
Thus, our seat design team decided to redesign and update the seat and seat attachment for the 2024 HERC competition.
Since September, we have first focused on redesigning the general design and fabrication of the seat.
RESEARCH
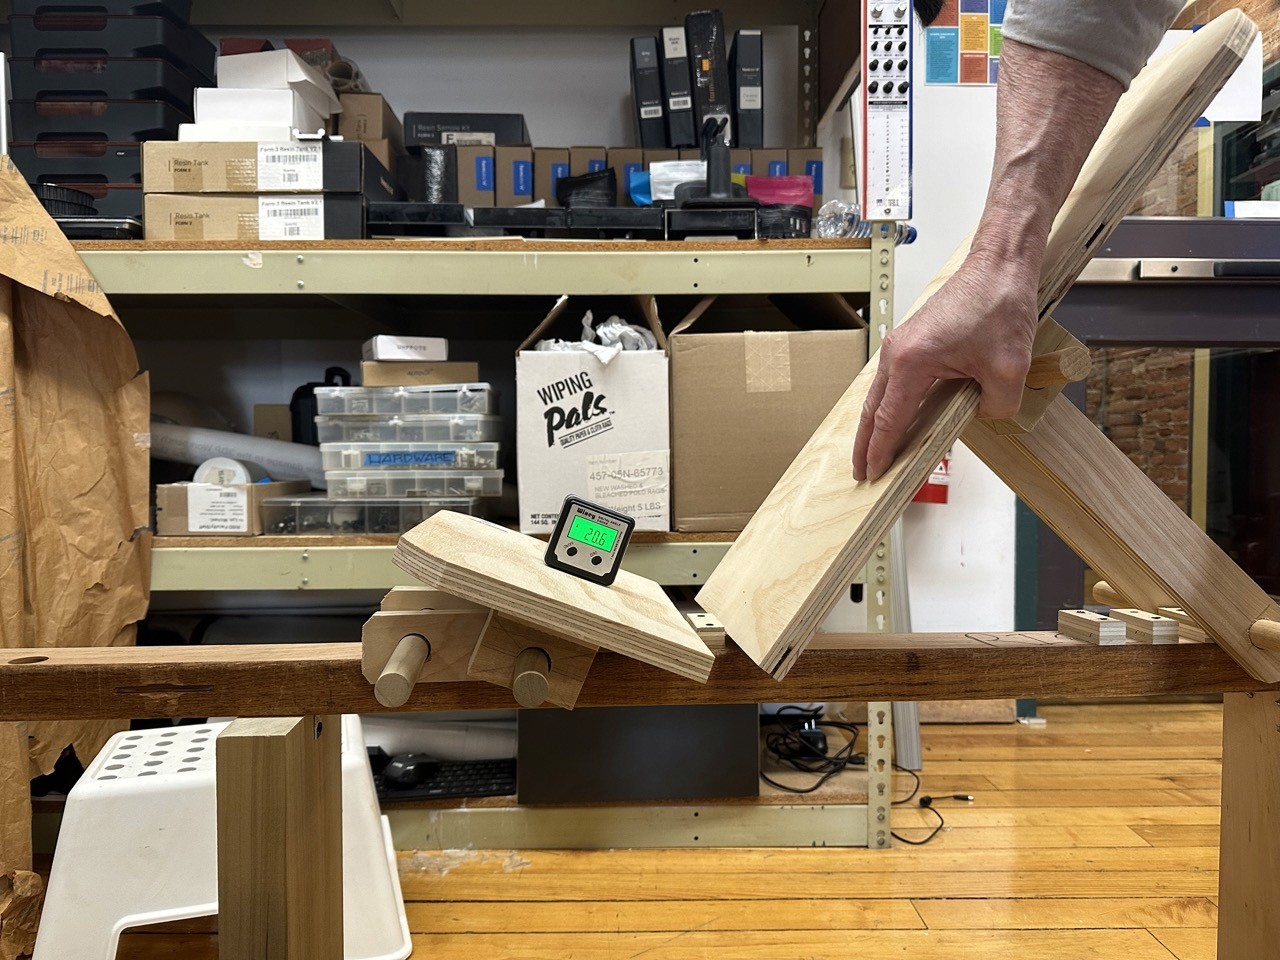
Discovering the best angle
Find the best seat angle
Firstly, we decided to find the best angle of the seat that can provide comfort and less burden to the drivers. Thus, we started to build the full-scale prototype that can test the different angles of the seat.
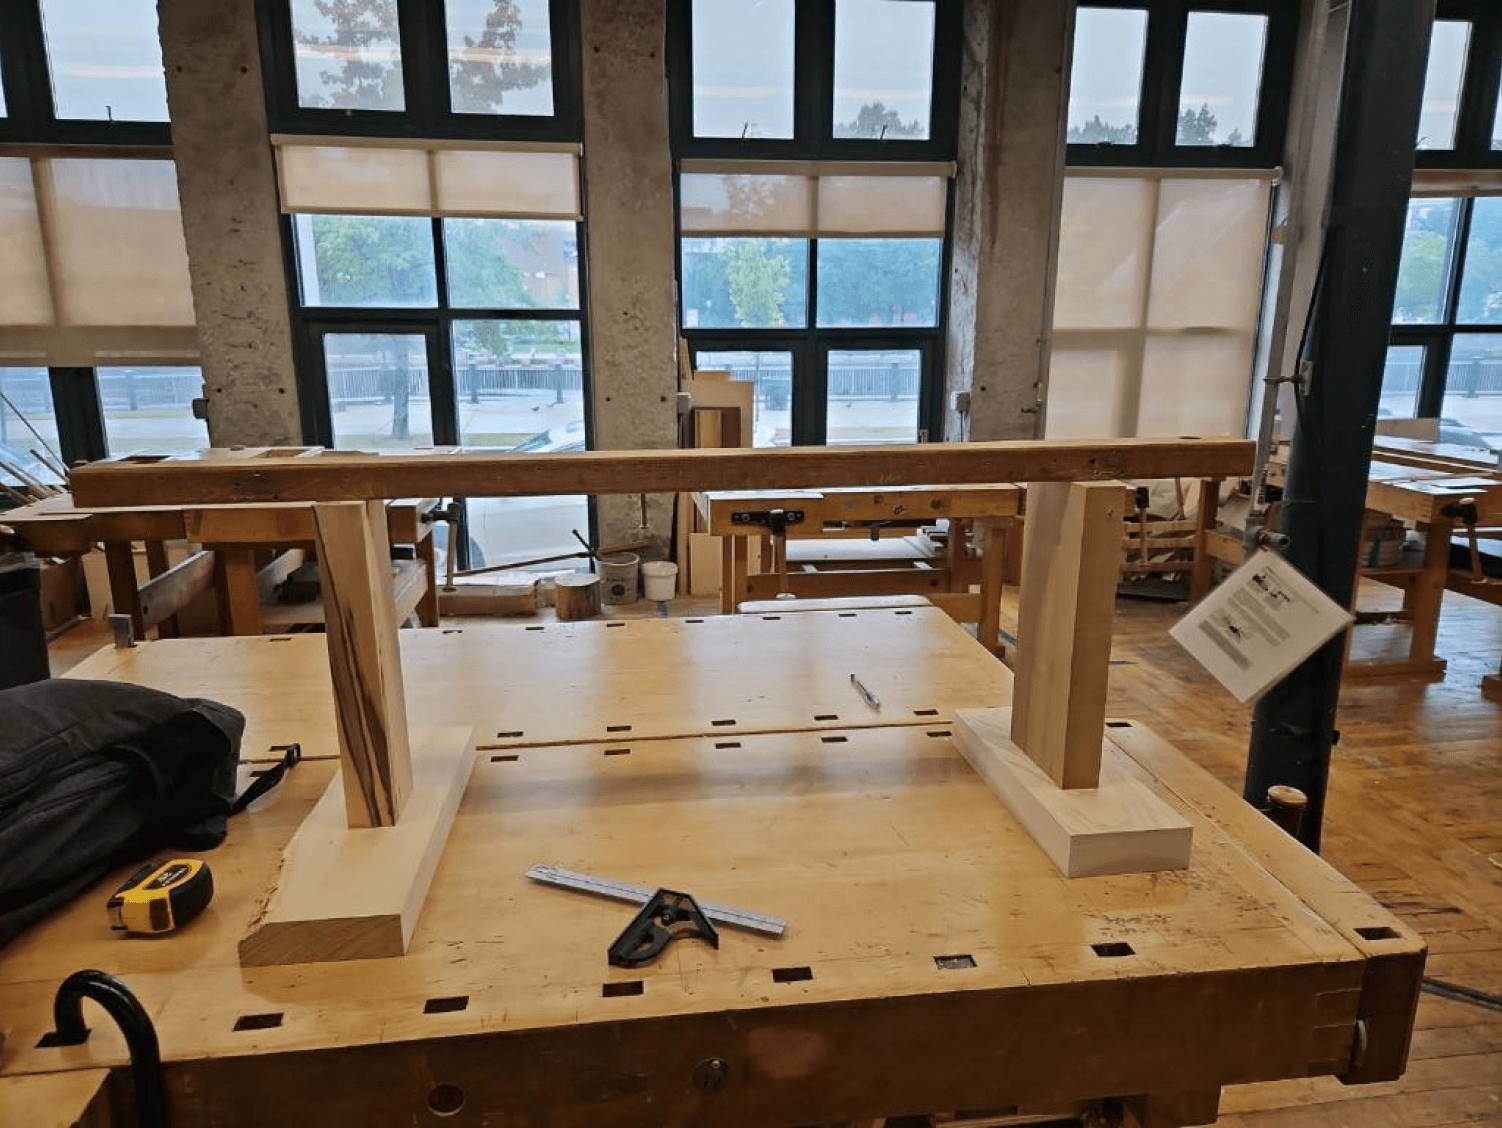
Wooden bottom supporting structure

Slots for testing different angles
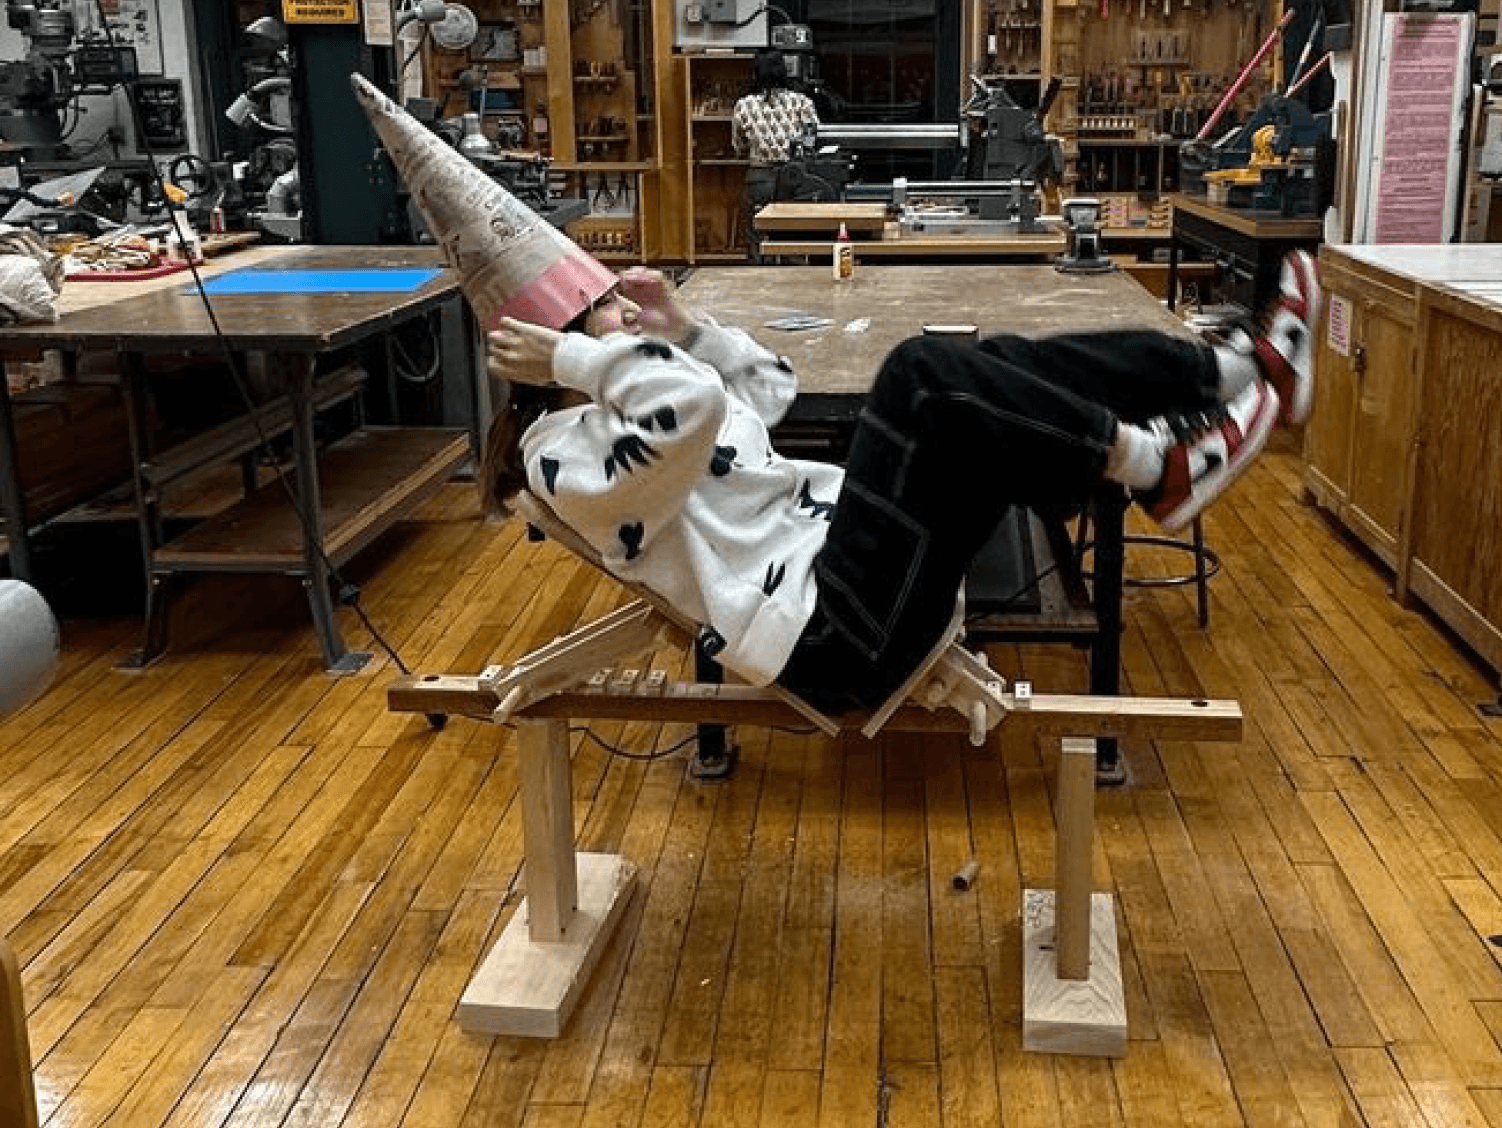
Testing the sturdiness

Prototype seat on the actual chassis
Almost found the best angle
For this prototype, we chose the best angle based on the wooden prototype and measured the angle. But we decided to adjust the angle after testing the prototype on the actual chassis.

Ergonomic consideration
Adding the ergonomic aspects
Based on the previous seat design and other seat references (cars, interior seats, etc), we used the blue foam to make the form and curvature of the seat.


FABRICATION
Seat Fabrication
Making a positive seat mold with blue foam.
After deciding the initial curvature and shape, we moved on to making the seat mold with blue foam for seat fabrication.
Cut the blue foam into the angle that we measured previously.
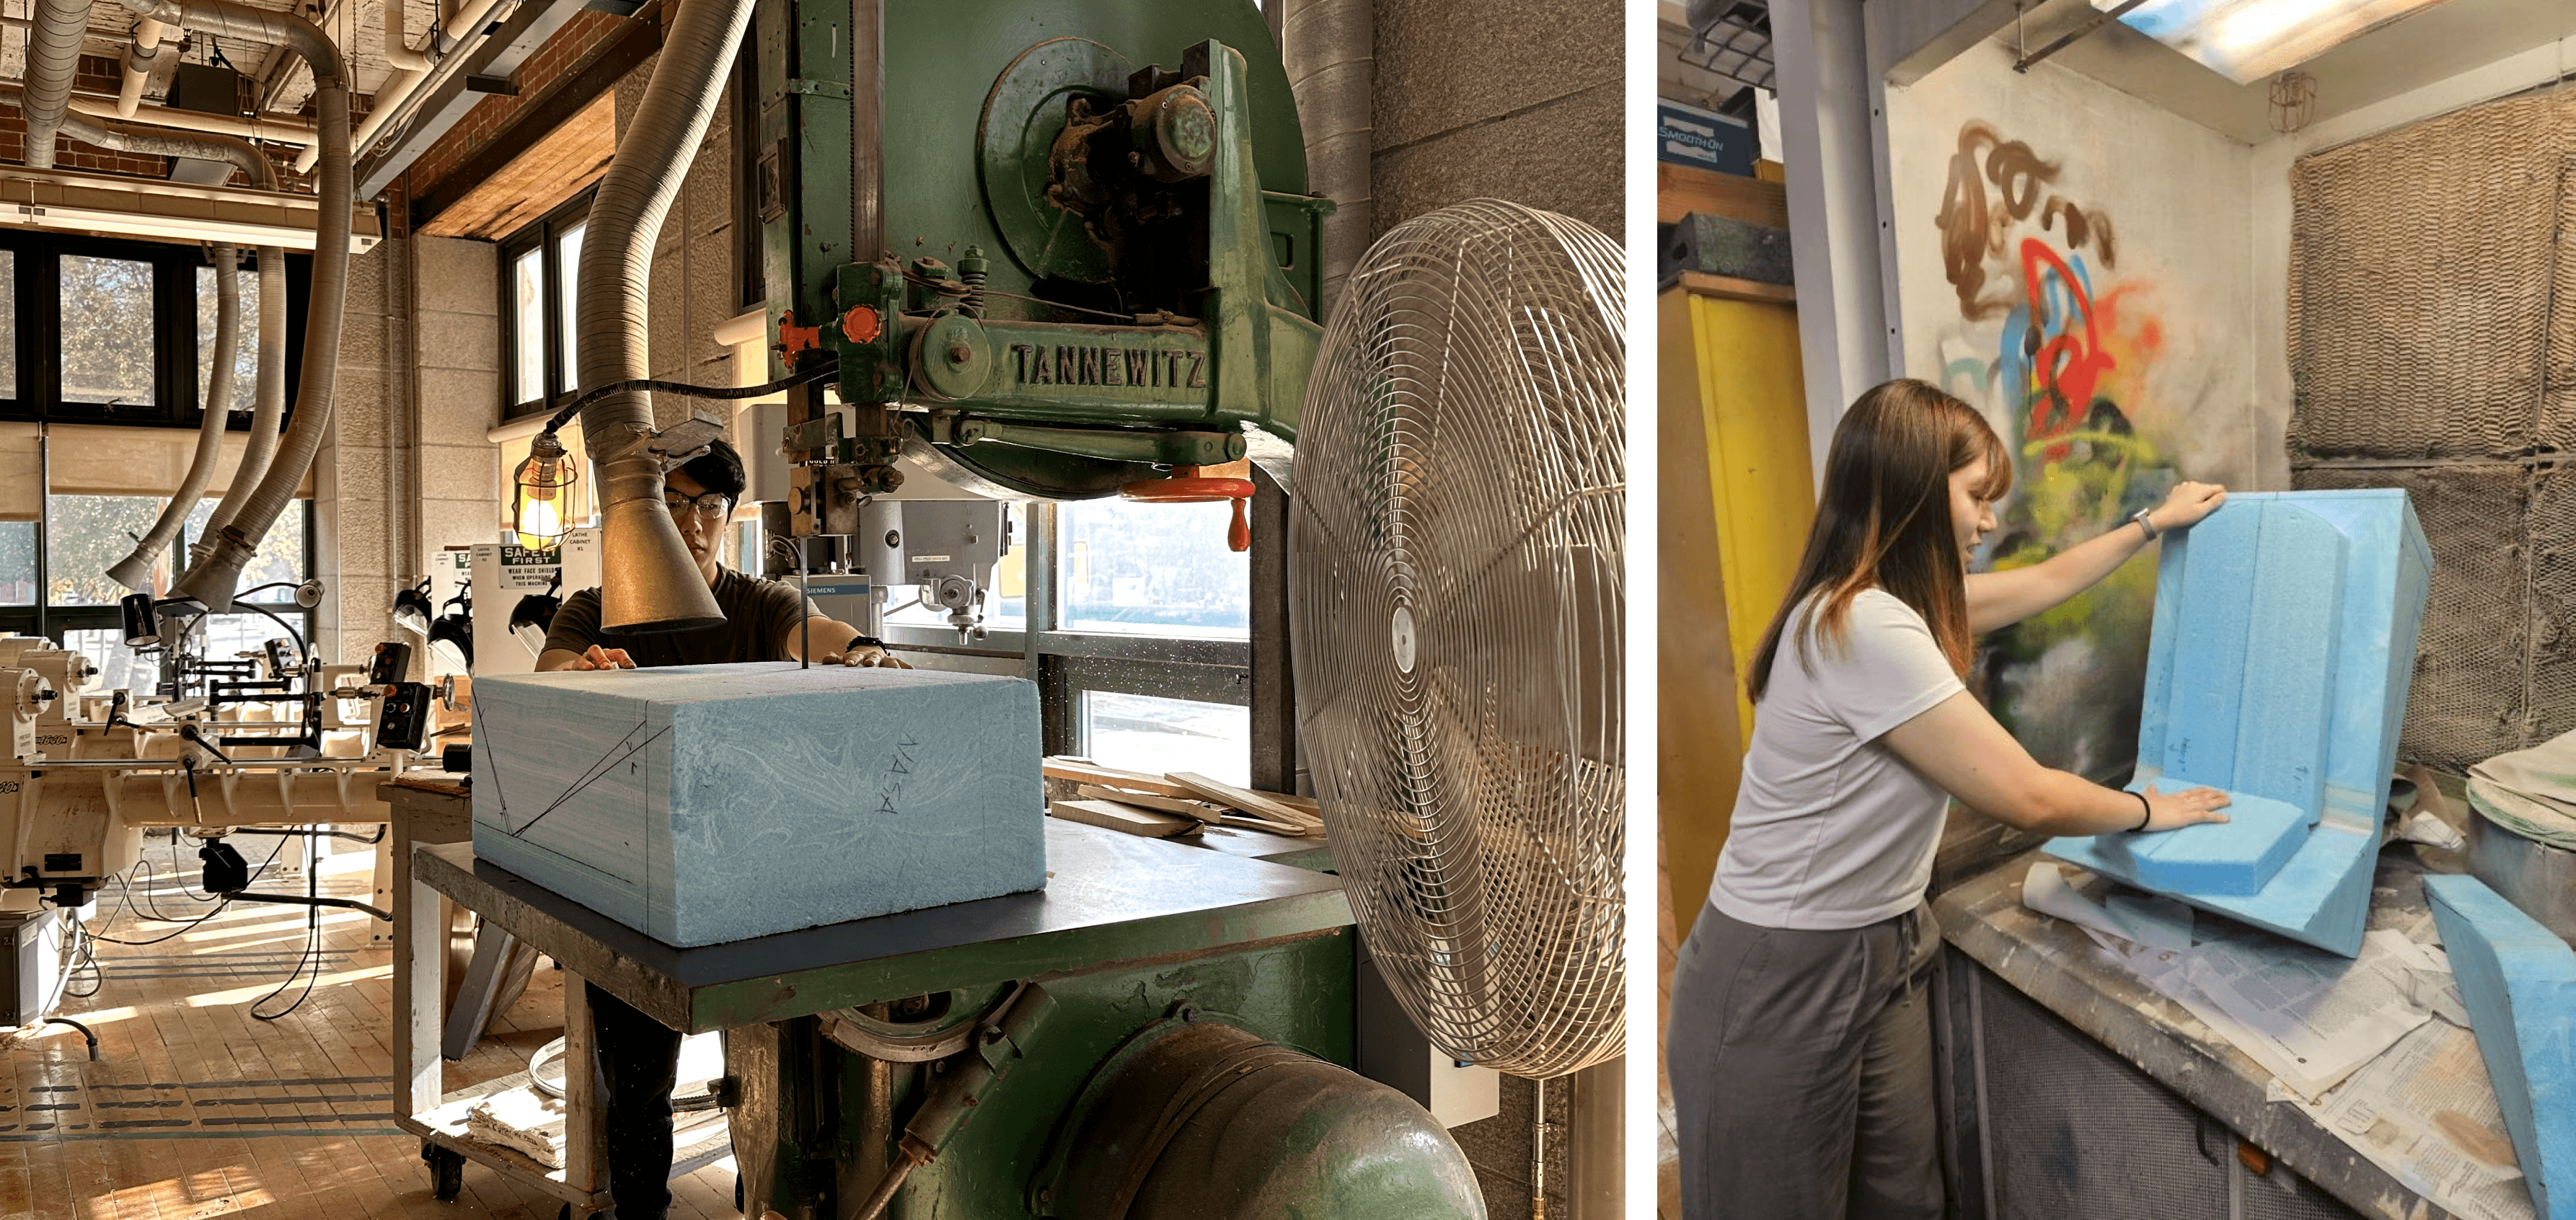
Create the template for the curvature and sand the blue foam down.
Let's prepare for the carbon fiber layup.
Carbon fiber is a material with high durability and light weight. Thus, our team decided to use carbon fiber for our seat.
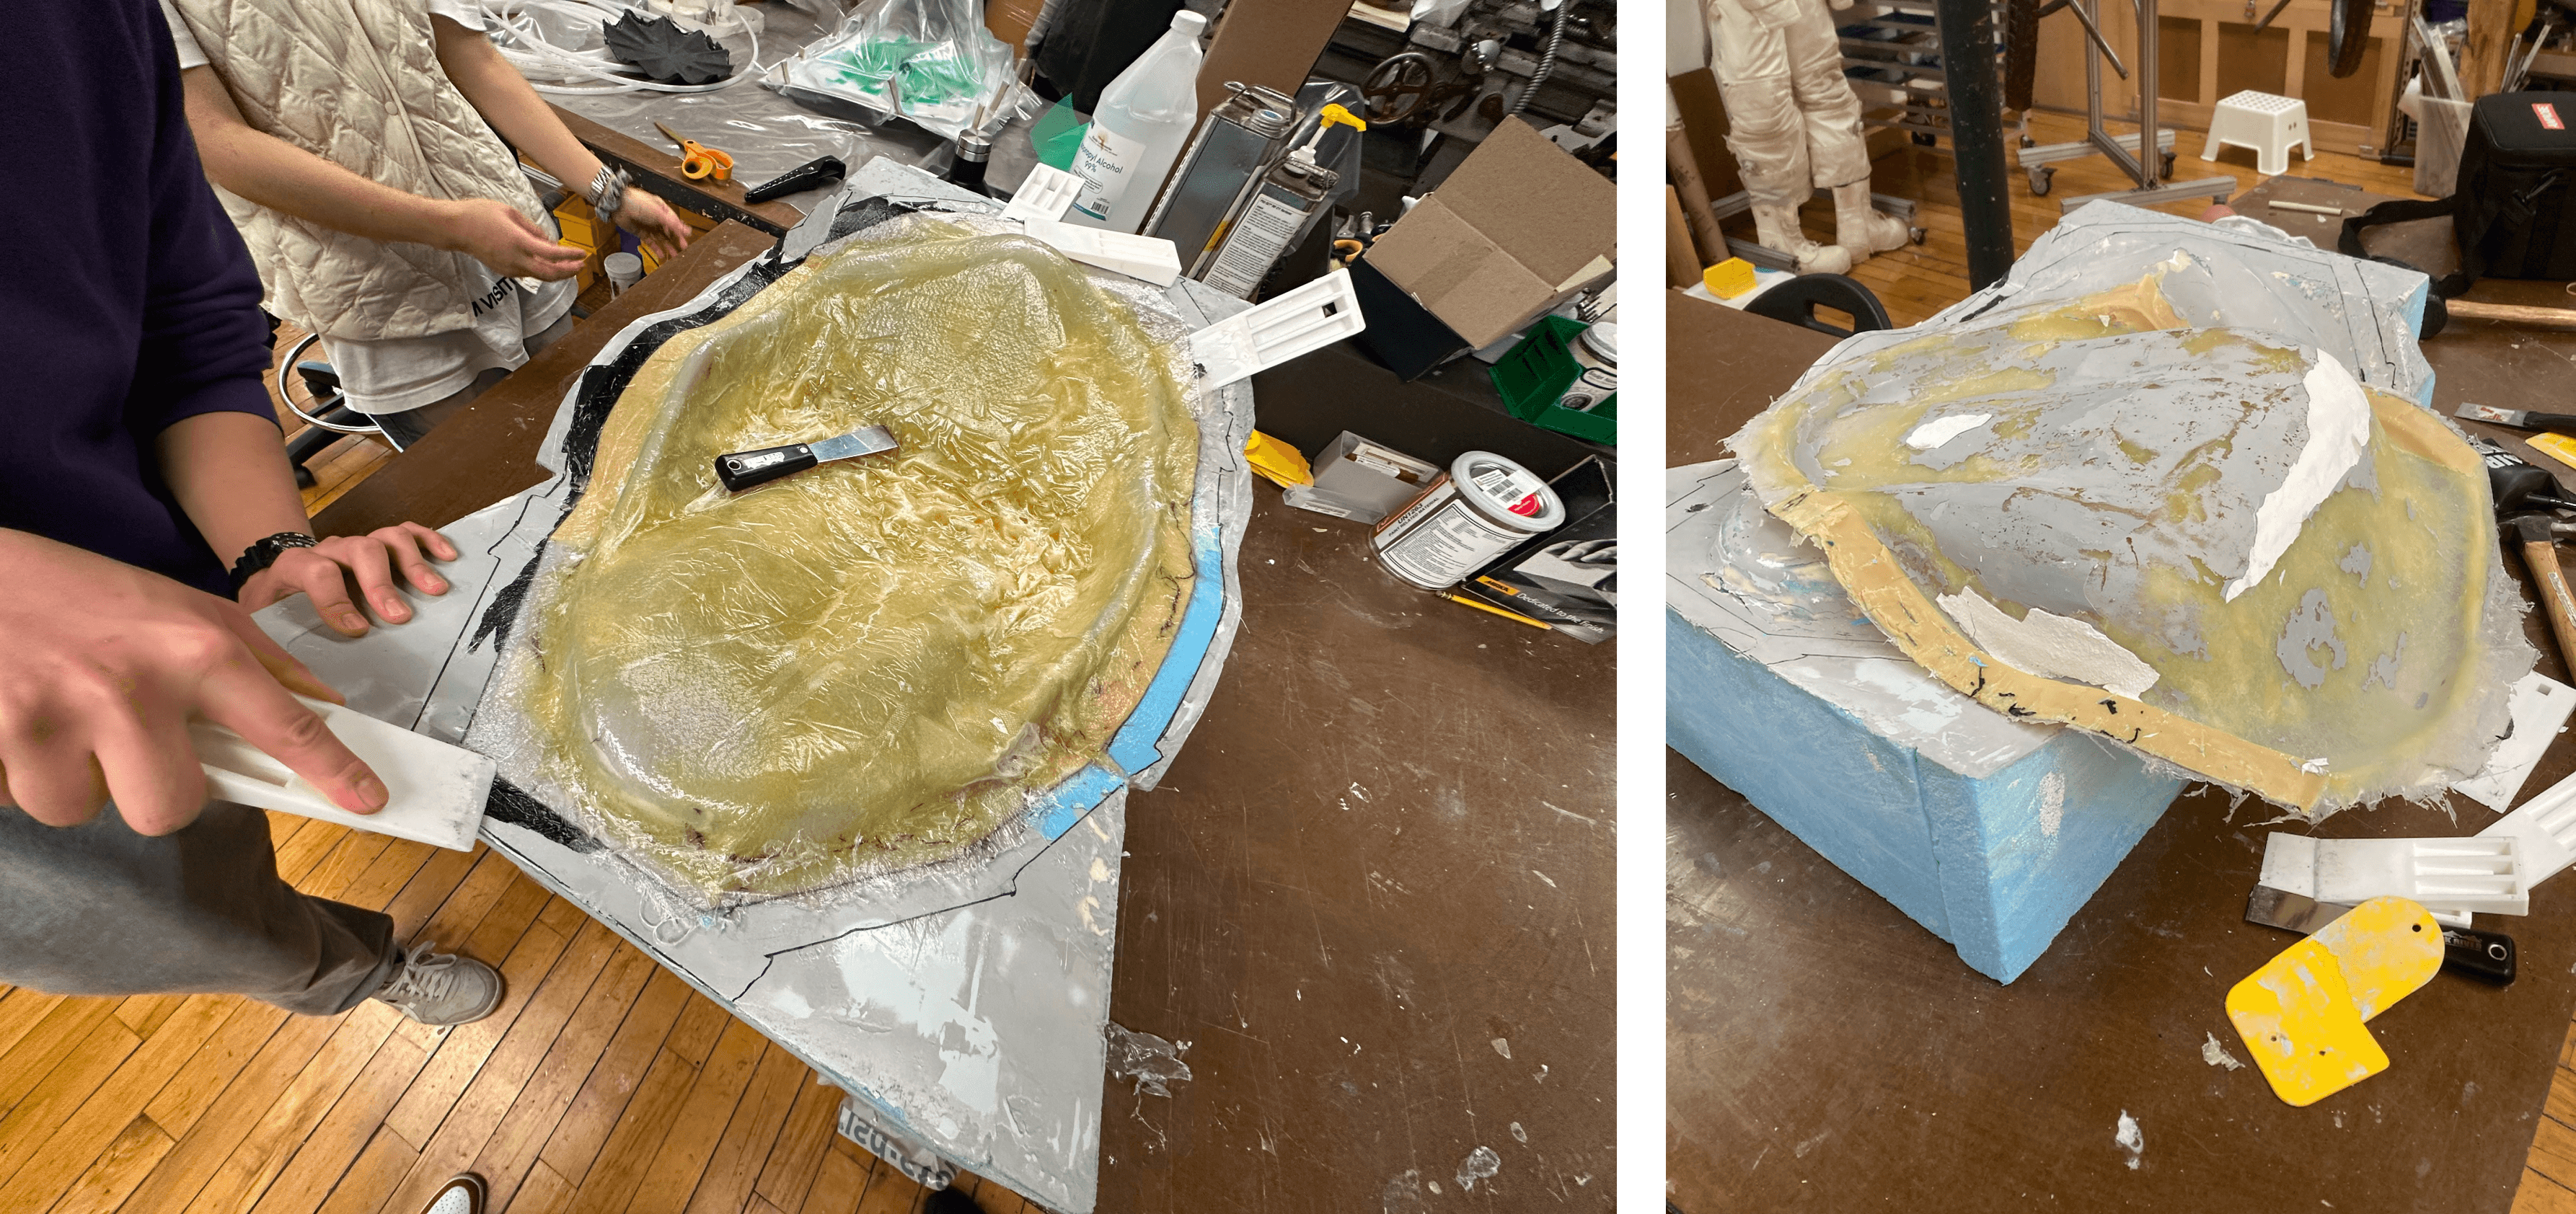
After mold making, we prepared for carbon fiber layup by coating the mold with several layers of epoxy, plaster, and fillers.

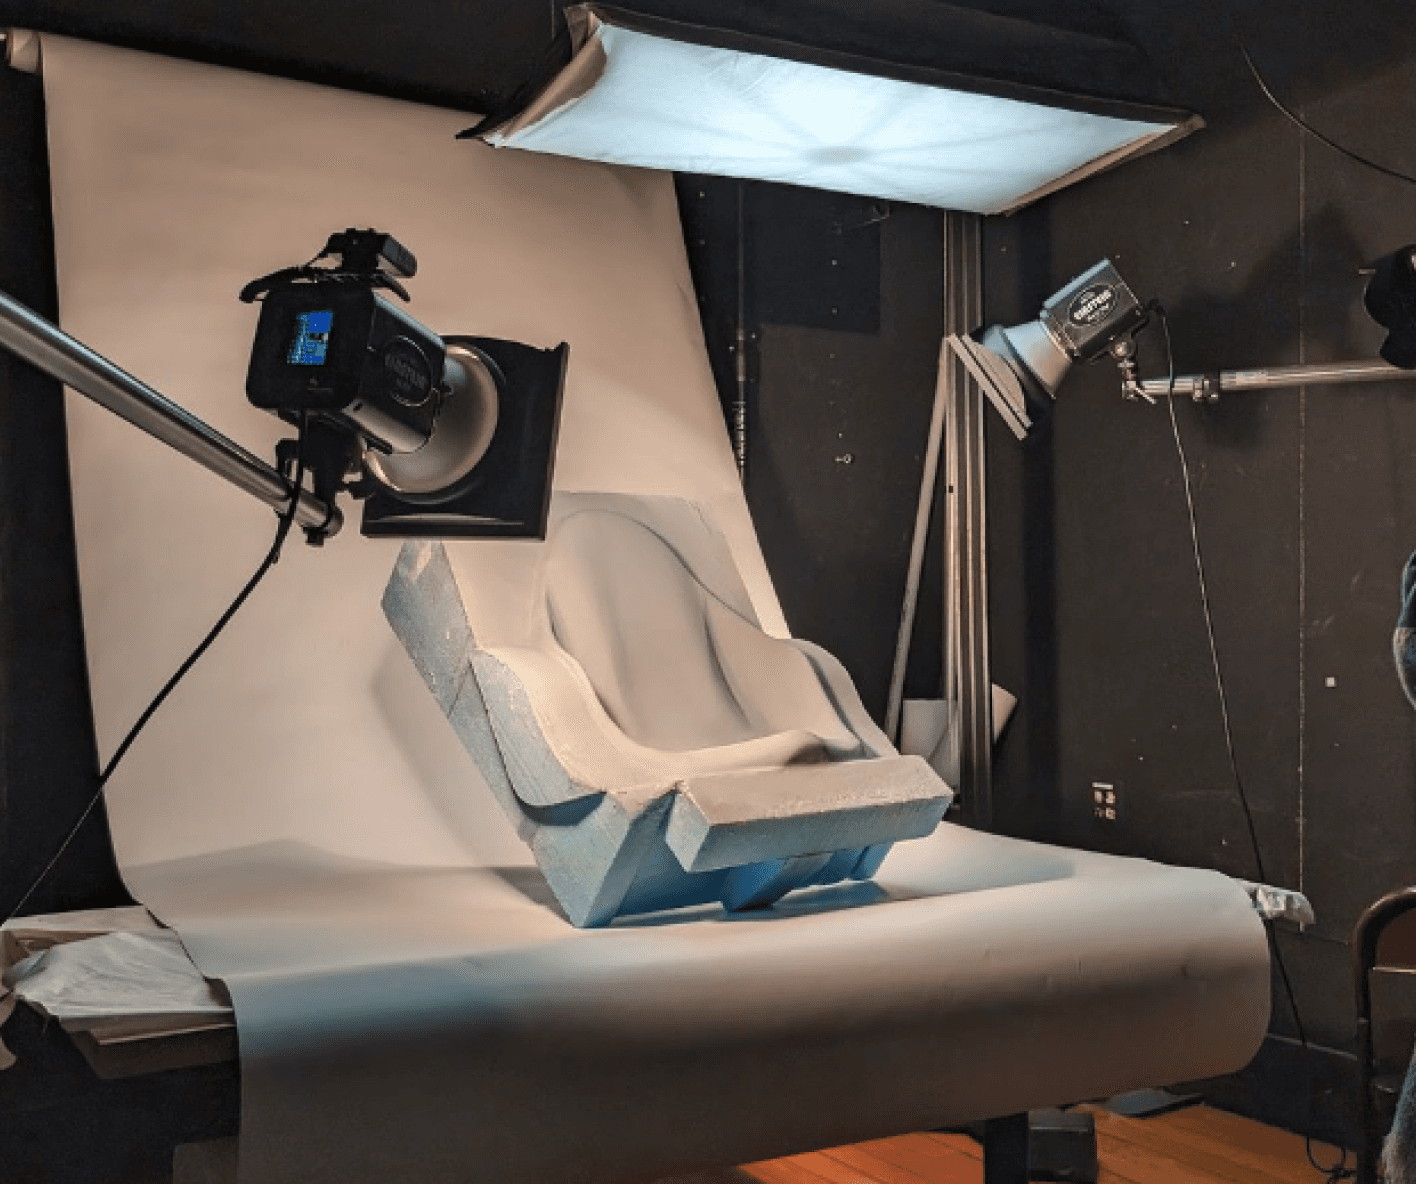
Fiber glass mold for carbon fiber
Before carbon fiber layup, we used fiberglass to make a mold for carbon fiber.
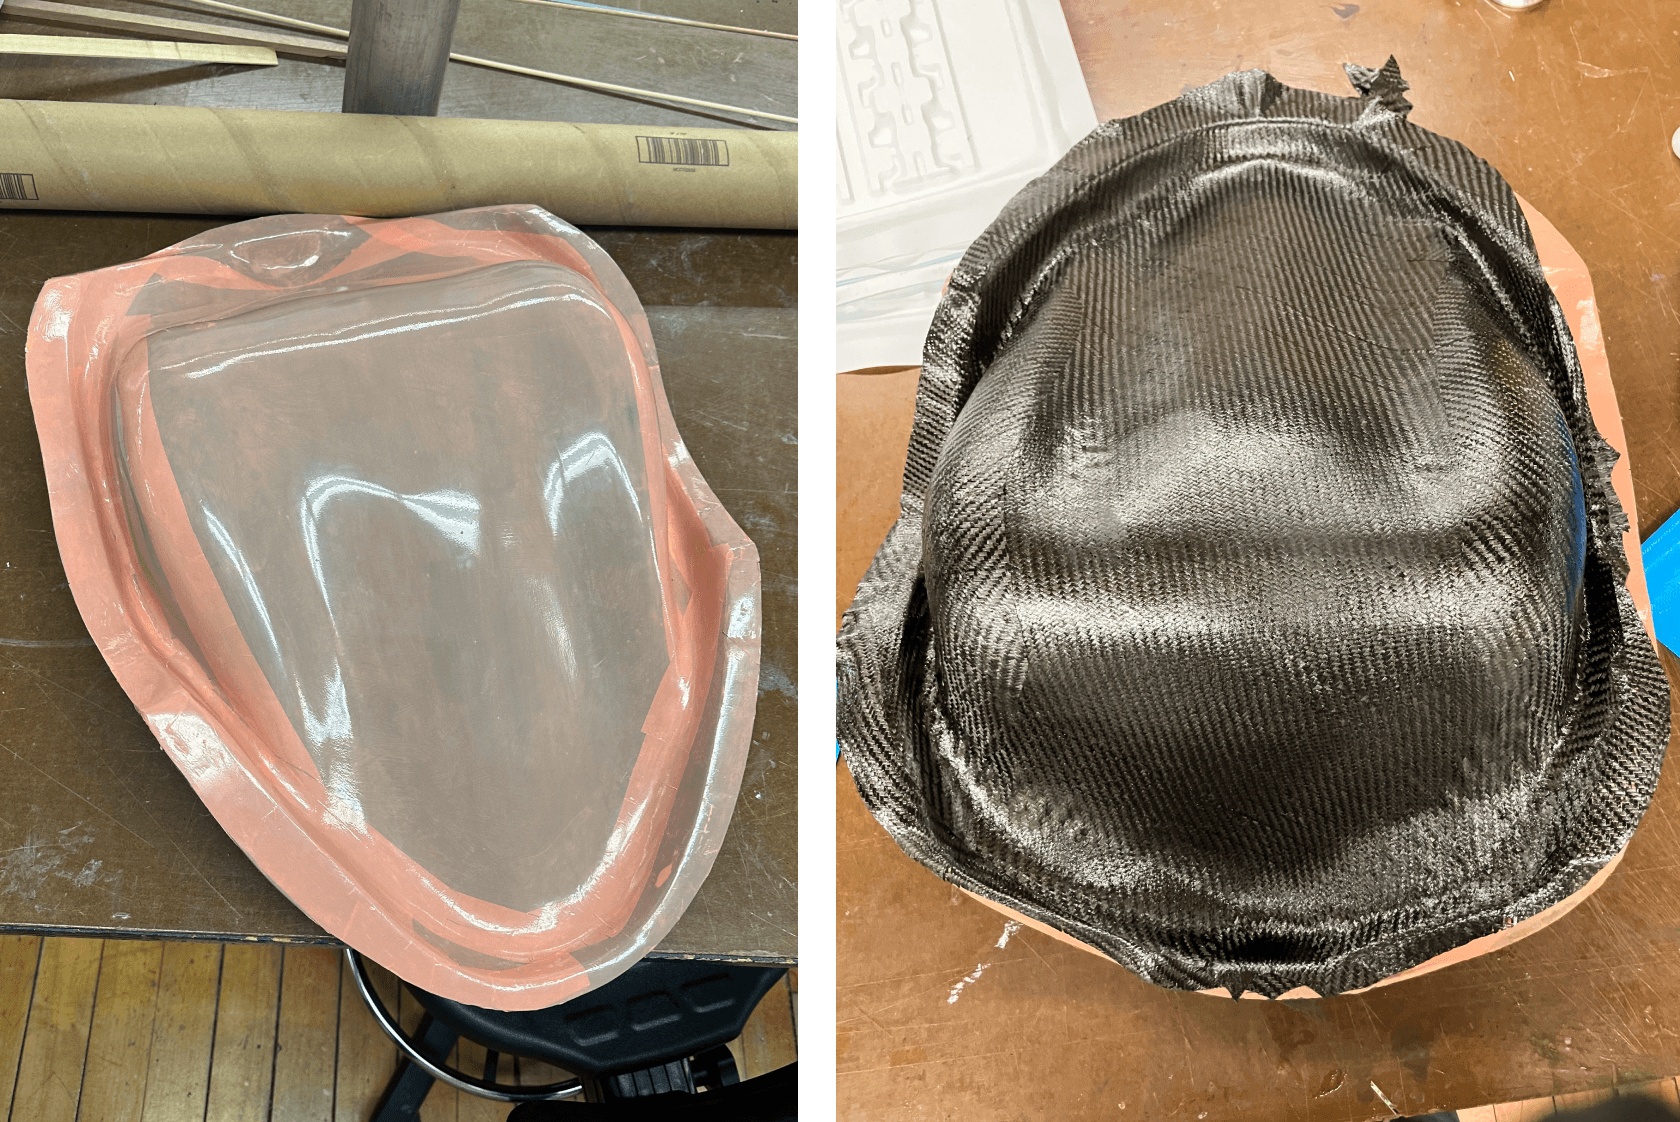
Twill prepreg carbon fiber lay up
Finally, we moved on to the prepreg carbon fiber lay-up.
Firstly, we put the film to protect the mold and made it easy to release by spraying the mold releaser after baking the carbon fiber.

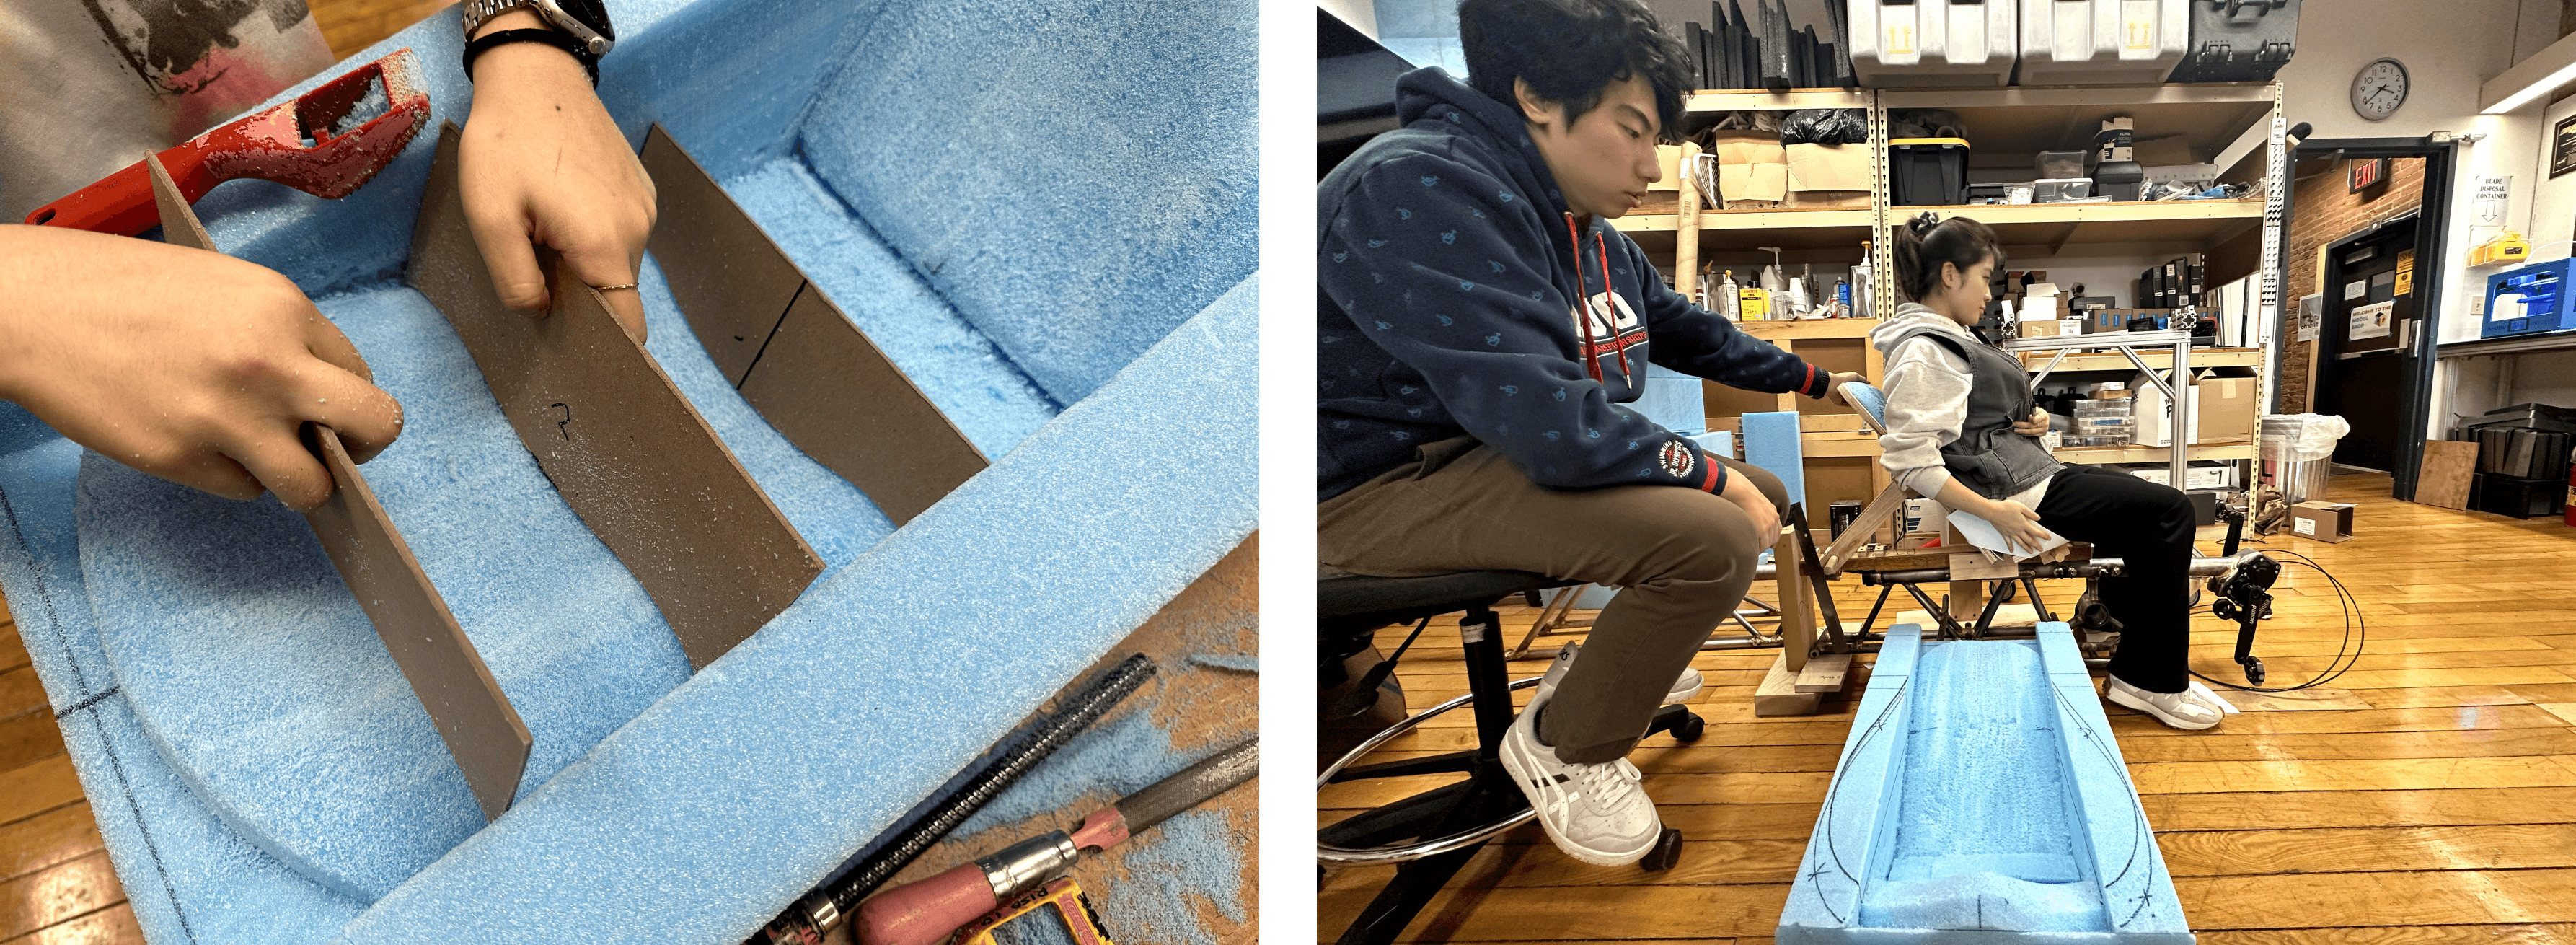
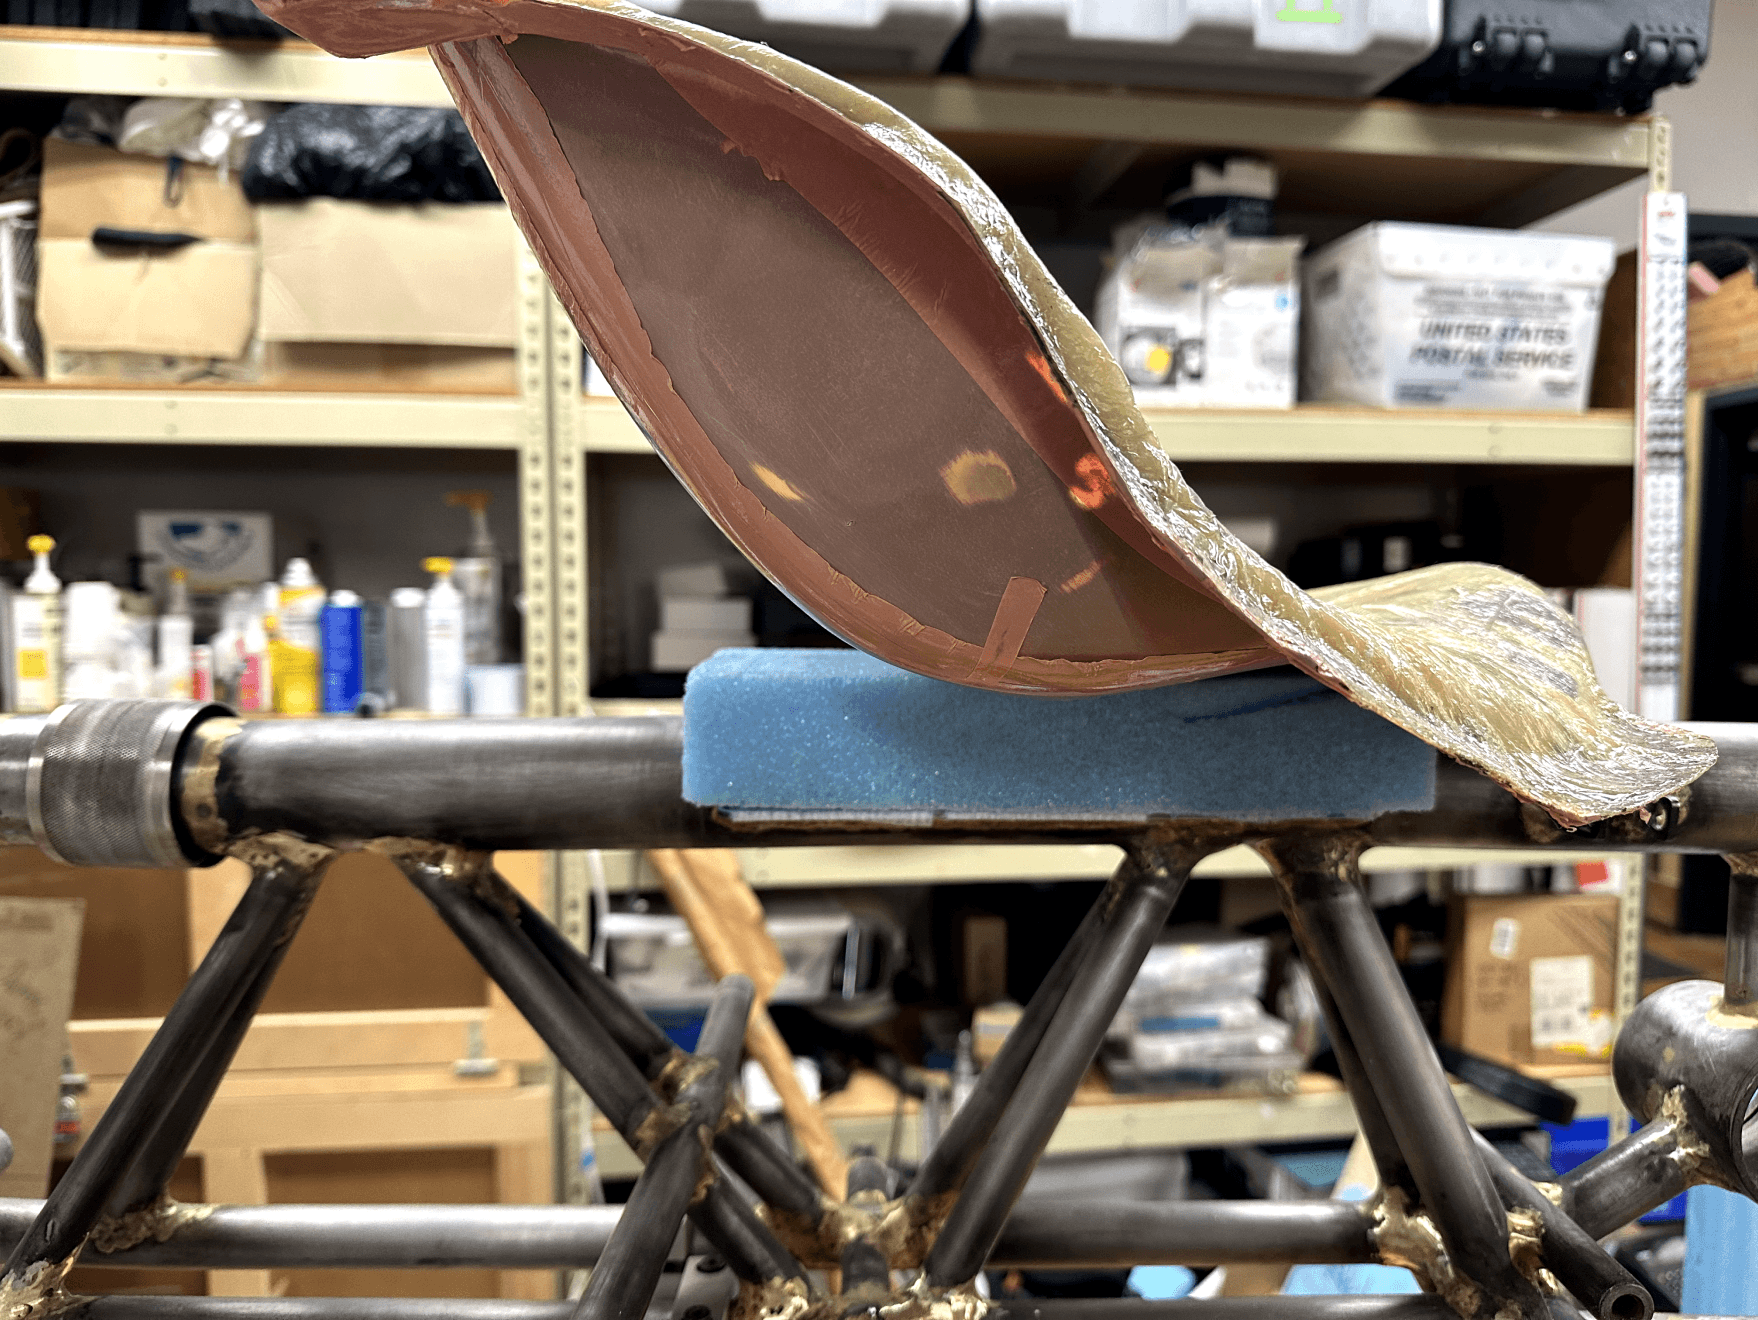
Seat attachment
Let's attach our new seats to the chassis.
After finishing seat fabrication, we moved on to the seat attachment.
First, we captured the curvature of the chassis by using the blue foam. Then we followed the same carbon fiber lay-up procedure as we did for the seat.
By using blue foam, we captured the curvature of the chassis.


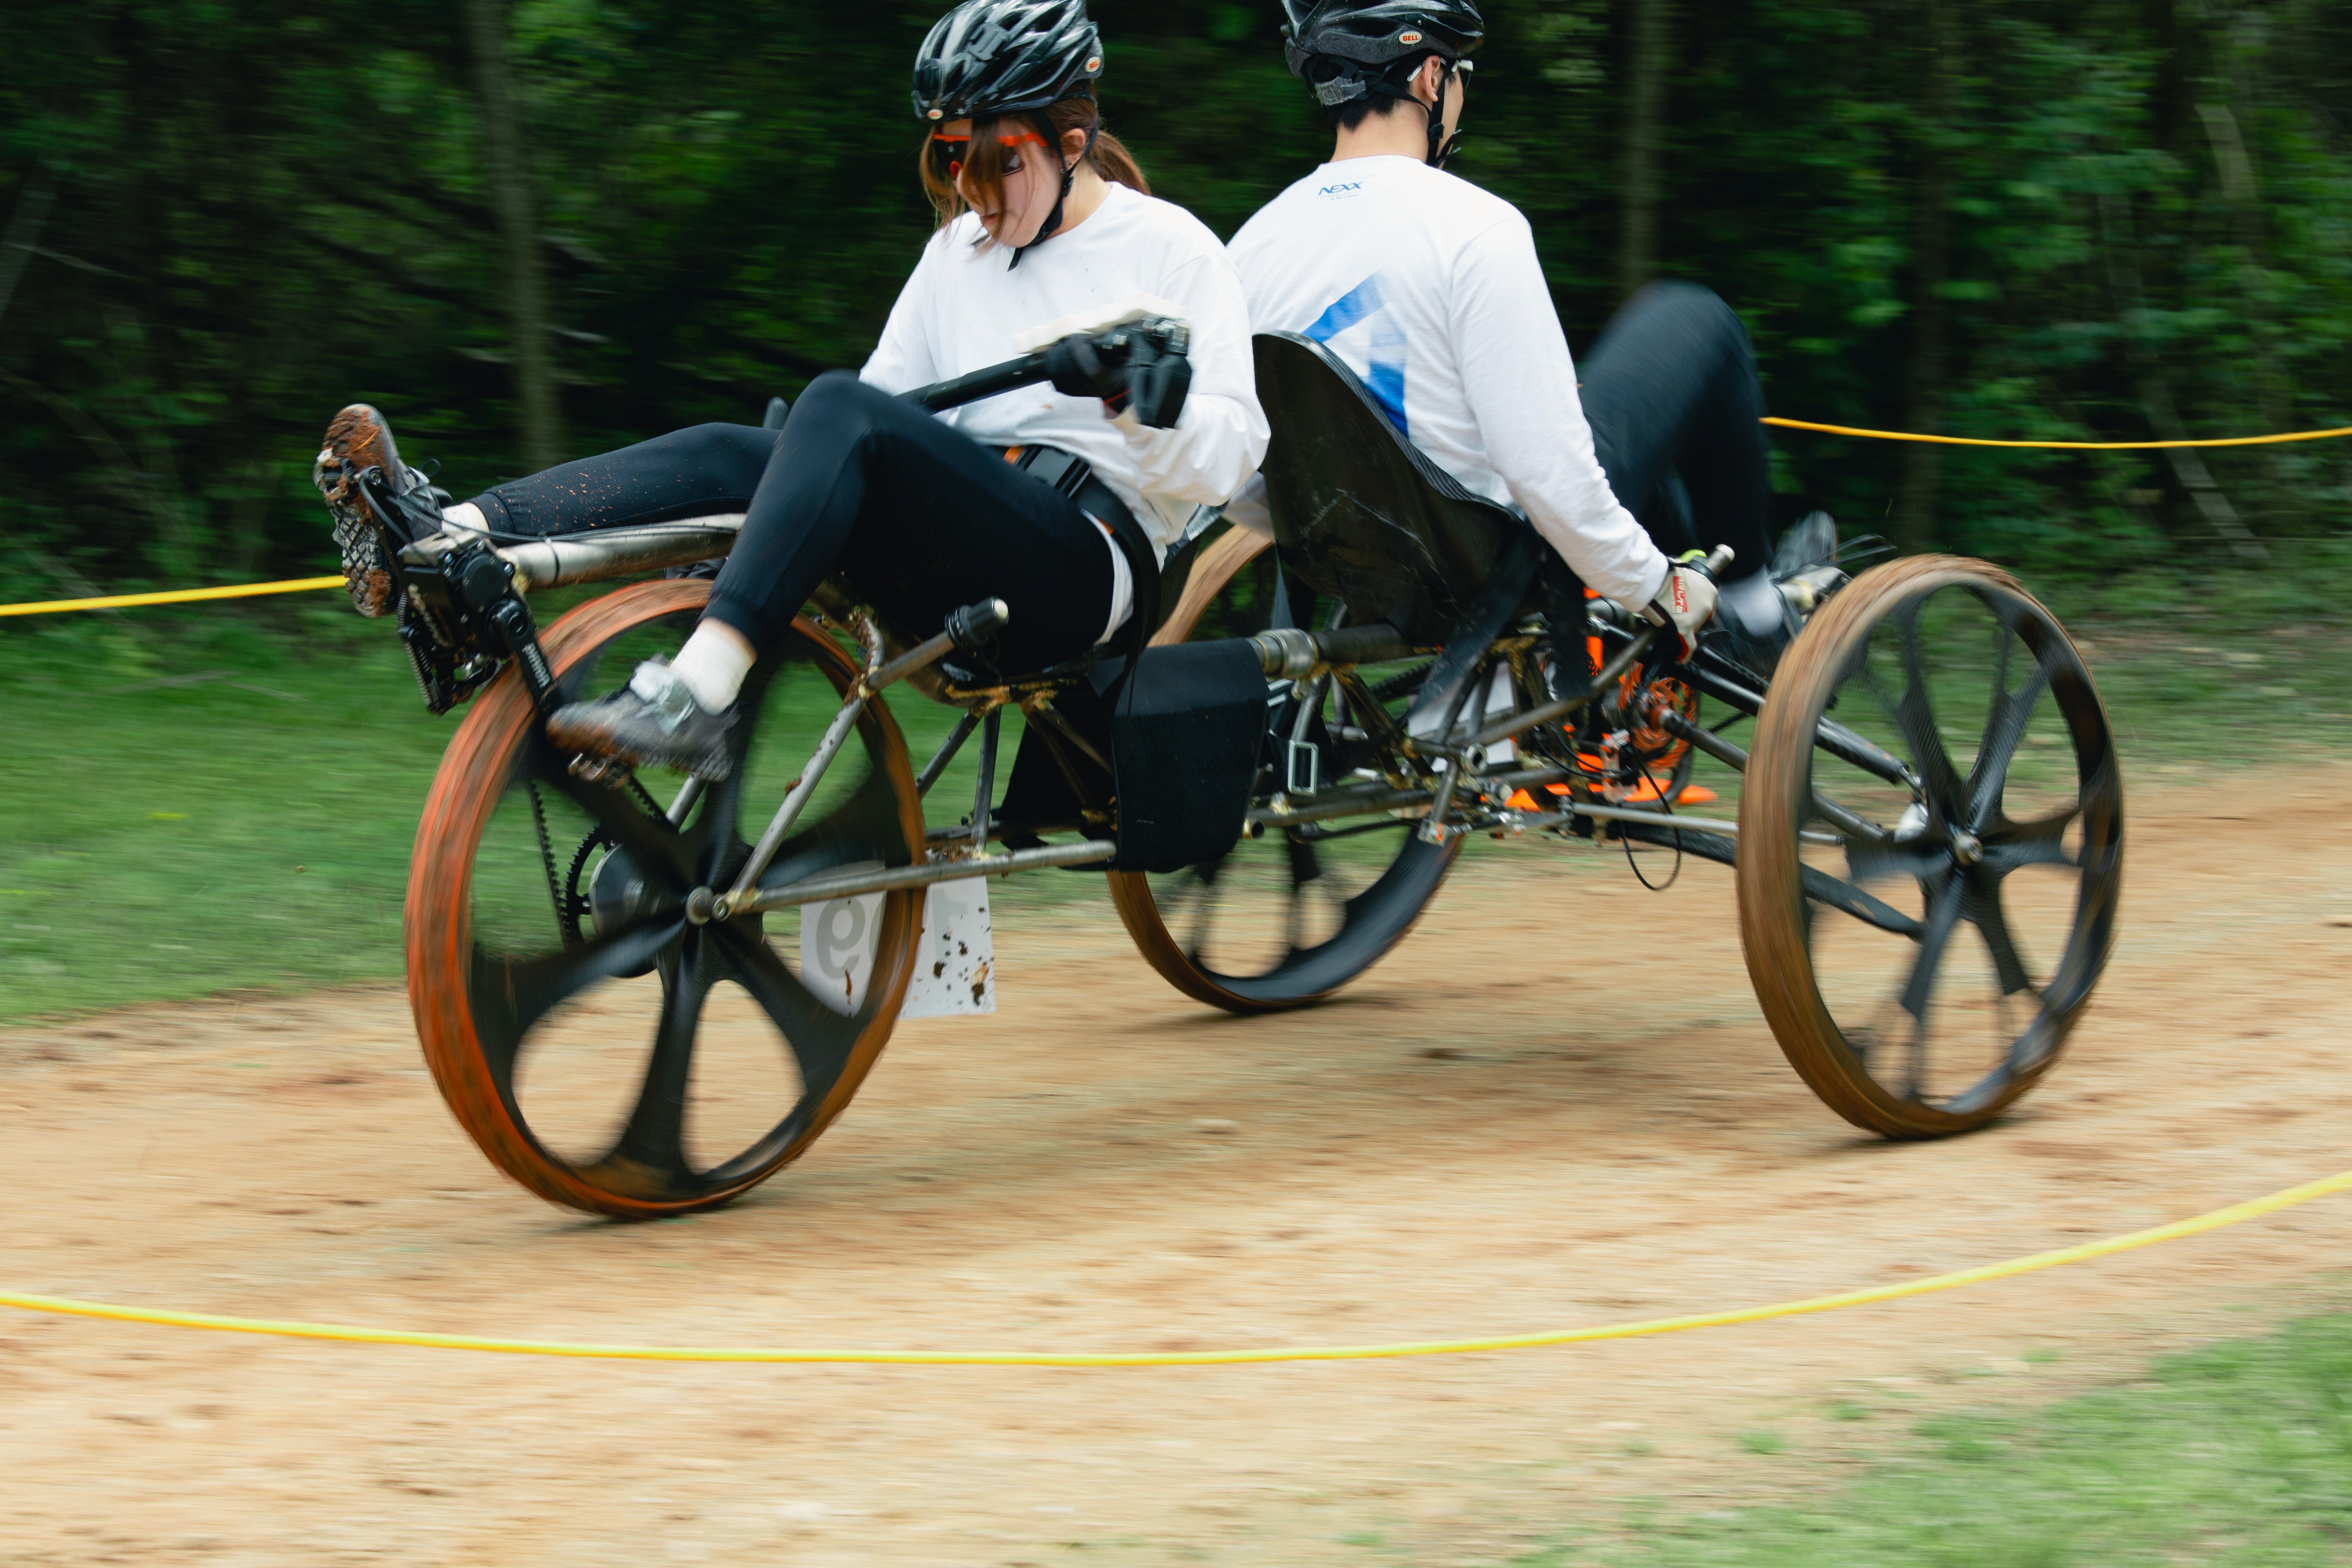
USER TESTING
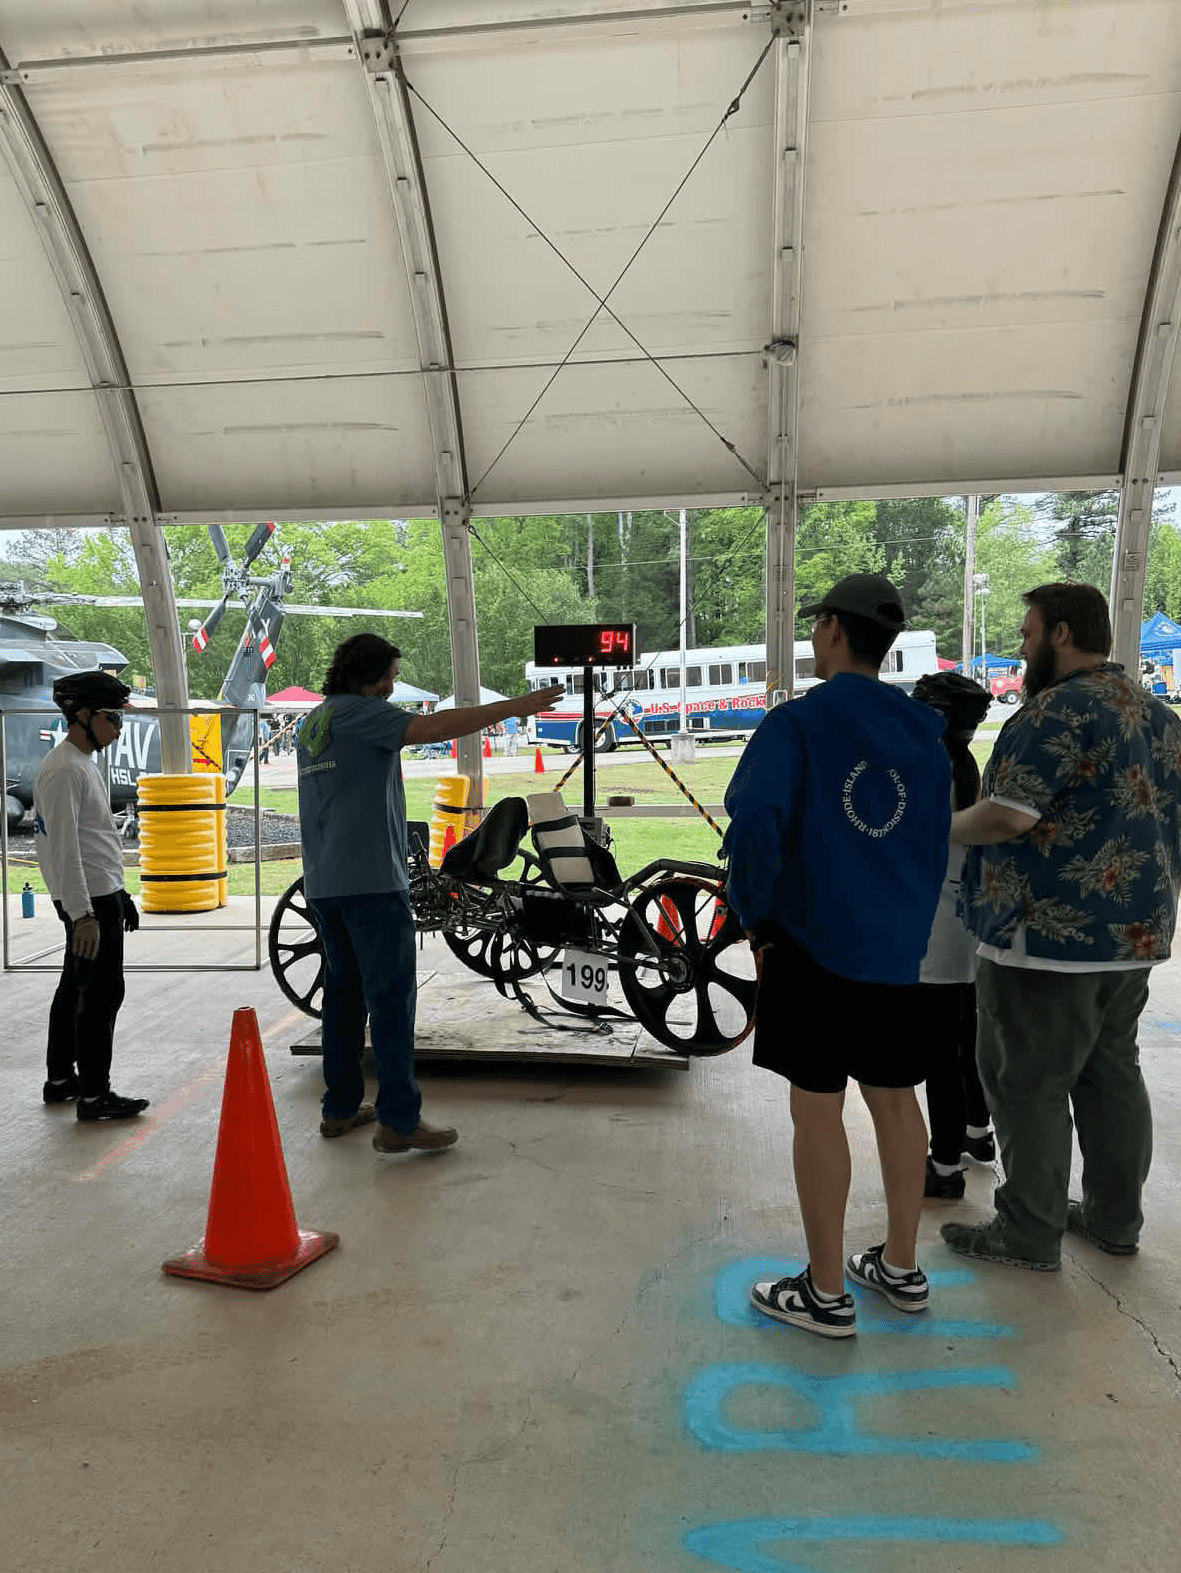
Let's have a test ride!
With our new seats and attachment, we brought the rover outside and had a test ride. We were confident that the sturdiness and design were improved, making us feel safer than last year.
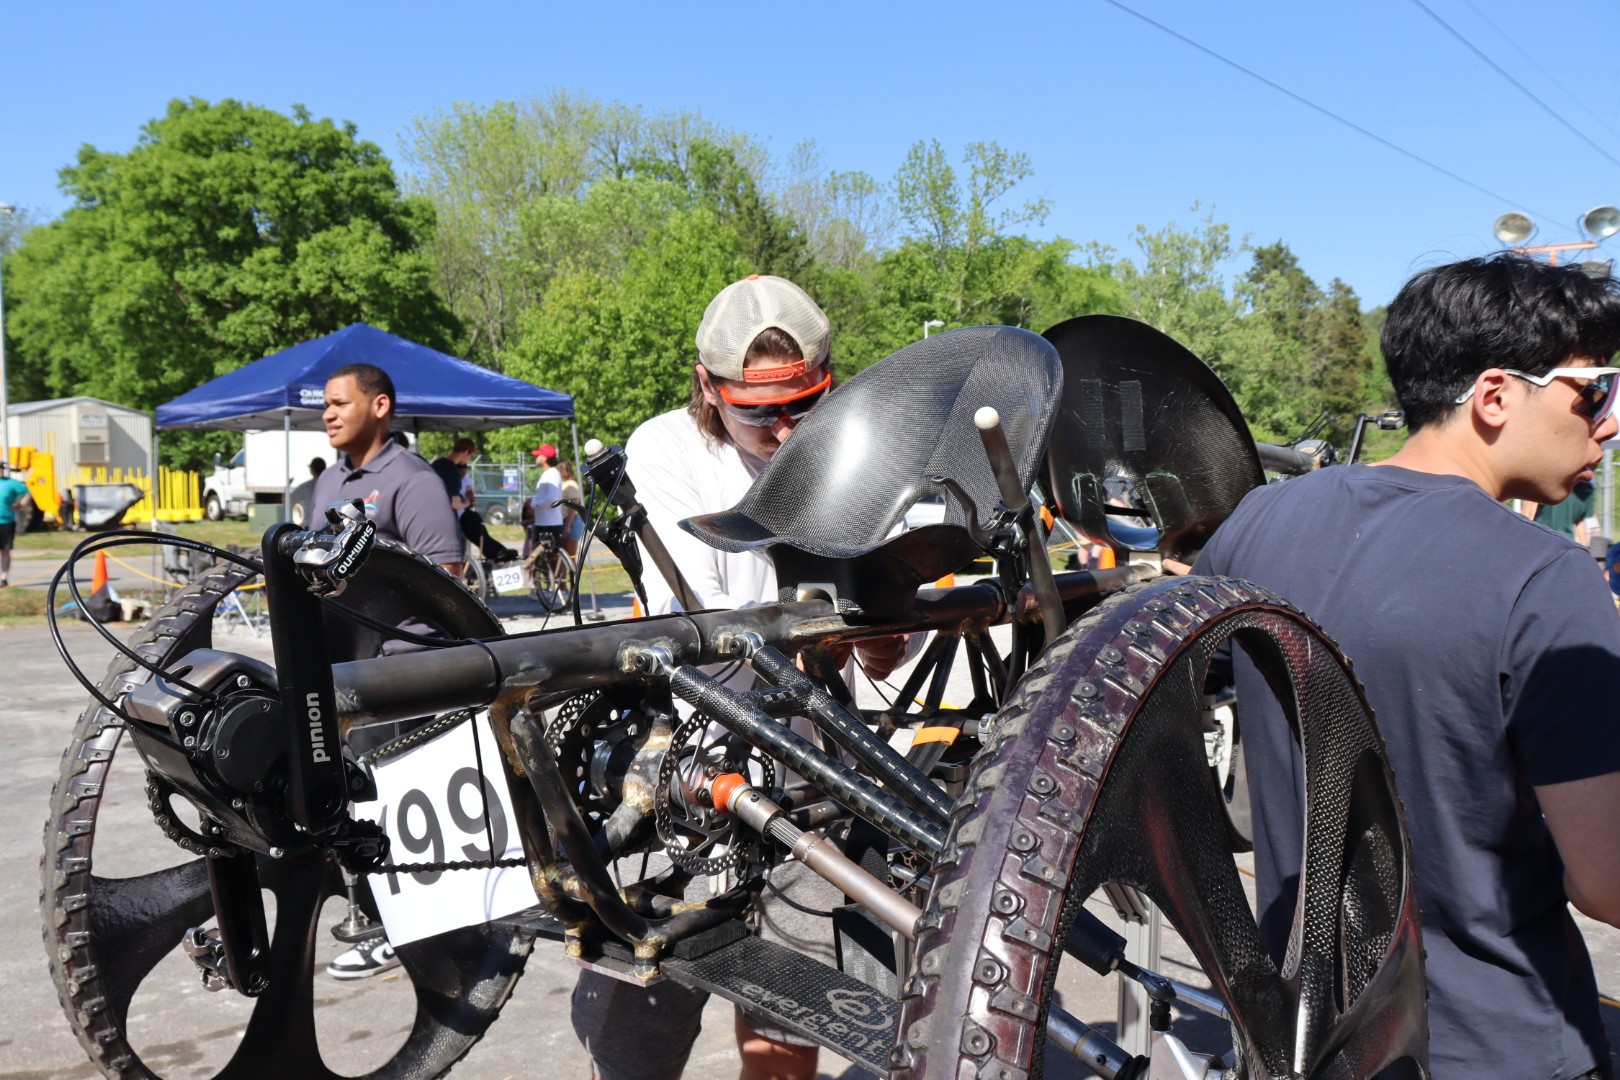
FINAL PRODUCT
Lightest 94lb Rover!
RISD ROVER won the "Featherweight Award" for the lightest rover, 94lbs, among the participants, including all divisions.
TAKEAWAYS
Importance of time management
During the whole project, we learned that planning and organizing among the sub-teams are the key to make the successful result. Since there were several teams, such as steering, seat design, wheels, and tool, we had to communicate and manage time thoroughly to keep the timeline. Even though there were unexpected failures during fabrication, we managed our timeline by selecting the priorities, sharing the progress, and communicating frequently.
Trust teammates!
For more than two years, I was a member of the RISD Astro club and worked as a product designer, rover driver, and management member. Throughout the year, we had lots of failures and successes. Every time we faced failures, the key to overcoming the failure was trusting the teammate and solving the problem together. Without the teammates, I could not experience this amazing competition and rover. I want to send great thanks to our teammates and advisor.
Thanks to the RISD Rover team members and Advisor Michael Lye.